 |
Small Santa Pattern

Materials Required:
AMERICAN THREAD COMPANY
"DAWN" BULKY YARN, Article W-33
2 oz. Crimson
2 oz. White
2 yds. Medium Wire
2 Blue Jewel Sequins for eyes, Red Jewel Sequins for Nose
Santa's hat, arms, body and legs are made by threading 2" lengths of yarn through center on to specified lengths of wire. Thread 3 or 4 strands on to wire, then bend wire over the strands to secure end.
Head: Wind White 40 times over 3½ inch cardboard, tie both ends, fluff into ball shape. Sew blue sequins in place for eyes and red sequins in place for nose. (Tint face with face powder if desired.)
Eyebrows: Cut 12 – 1 inch strands of White. Sew 6 strands in place for each eyebrow.
Moustache: Wind White 30 times over 3½ inch cardboard. tie one end, cut other end. Brush and comb until fluffy. Attach in place.
Beard: Wind White 60 times over a 5 inch cardboard and complete same as moustache.
Cut remainder of White into 2 inch lengths, cut Crimson skein in half then cut into 2" lengths. Cut wire into 2 – 14 inch lengths (1 for arms and 1 for legs), 1 – 9 inch length for center section, 1 – 12 inch length for Crimson of hat and 1–9 inch length for White of hat. To assemble Santa – Starting with arm section, thread White onto wire for about 1 inch, then thread Crimson to within 1 inch of end, thread White onto remainder of wire. Thread 9" length for center section in Crimson. Thread leg section same as arm section. Fold leg section in half, fold body section in half, then fold body section around center of leg section, and join center section together at top. Fold arm section in half, pull through center section. Bind sections firmly at joinings. Wire head section and body section together firmly. Cut sufficient amount of 2" lengths of White in half for 9" section of hat. Thread on to wire and attach to head section. Thread 12 inch length of wire with Crimson for hat and complete one end with 1 inch of the 2 inch lengths in White. Attach to top of head section with wires, leaving 3" of this wire free of head section.
Christmas Tree Pattern
Santa Pattern
Xmas Wreath Pattern
Christmas Pom Poms Pattern
Fluff Star Pattern
Christmas Angel Pattern
Christmas Bubbles Pattern
Christmas Cards Pattern
Small Santa Pattern
Bird Pattern
Xmas Tree Pattern
Place Card Xmas Tree Pattern
Harlequin Pattern
Xmas Bell Pattern
Basket Doily Pattern
Pink Crocheted Glitter Pattern
Glitter Star Pattern
Christmas Cards Pattern

Materials Required:
AMERICAN THREAD COMPANY
"DAWN" KNITTING WORSTED
⅓ ounce each Golf Green, Scarlet, White, National Blue, Amber and Black
Casein Glue and Art Paper
Fold art paper to desired size and shape.
Roughly sketch Tree, Wreath, Candle or Angel as pictured. Cut yarn into ¾ inch lengths. Completely cover sketch with glue then with ¾ inch lengths of yarn, cover design completely.
Angel–Cover dress with White. If desired, a suitable face from a magazine may be pasted in place. Wind Amber between fingers to form curl, then bring yarn around face and form curl on other side of face. Cut 2– 1 inch lengths of Scarlet for candles. Top each with a ¼ inch length Amber for flame. Wind Gold Christmas cord flat between fingers and paste in place for halo.
Christmas Tree–Cover tree completely with Green yarn, cut into ¾ inch lengths and placed in branch like position. Wind a 1½ inch length flat between fingers to form spiral and paste in place for Christmas balls. (We used Scarlet, Blue, Amber and White for balls).
Wreath–Work in same manner as Tree, having balls in Scarlet, Amber, Blue and White placed as illustrated. Tie an 8 inch length of Scarlet into bow and paste in place.
Snow Man–Sketch as desired. Wind a 7½ inch length of White flat between fingers for head and paste in place. Wind a 13 inch length flat between fingers for center section and paste in place, then wind a 20 inch length flat between fingers for lower section and paste in place. Wind a 1 inch length of Black flat between fingers for button and paste in place on center section. Work 2 more buttons in same manner. Wind a 1 inch length of Scarlet and paste in place for Nose. Separate a ⅜ inch length of Black in 2 parts and paste in place for Eyes. Paste a 1½ inch length of Scarlet in place for Mouth.
Scarf–Cut a 7 inch length of Amber. Wind one end flat to fit at Neck, paste in place. Paste tip of other end of scarf in place, cut free end of scarf at center and tie at neck edge.
Hat–Cut a 4 inch length of Green. Hold length of yarn between fingers, wind flat to form a length 1¼ inches. Paste in place for Hat trim. Cut a 3½ inch length for top of Hat and wind flat between fingers for top of Hat. Wind a 1 inch length of Amber for Hat trim and paste in place. (This card most effective if made on Black paper).
Candle–Cut three 1¼ inch lengths of Scarlet for candle. Paste in place. Cut 3¼ inch lengths of Amber and paste in place for flame. Paste ¾ inch lengths of Green and paste in branch-like position below candle.
Envelope–Take 2 sheets of paper, cut one same width and ½ inch shorter than length of card. Fold second sheet over 1st sheet to form ½ inch seam at bottom of envelope. Fold again to form top of envelope. Fold again at each side, trim at each side at top and each side at bottom to form ½ inch seam. Paste seam together. (If card is small enough for one length of paper, make envelope in same manner omitting seam at bottom of envelope).

Christmas Tree Pattern
Santa Pattern
Xmas Wreath Pattern
Christmas Pom Poms Pattern
Fluff Star Pattern
Christmas Angel Pattern
Christmas Bubbles Pattern
Christmas Cards Pattern
Small Santa Pattern
Bird Pattern
Xmas Tree Pattern
Place Card Xmas Tree Pattern
Harlequin Pattern
Xmas Bell Pattern
Basket Doily Pattern
Pink Crocheted Glitter Pattern
Glitter Star Pattern
Christmas Bubbles Ornament Pattern

Materials Required:
AMERICAN THREAD COMPANY
AUNT LYDIA'S" HEAVY RUG YARN, Article 235
1 skein White or color of your choice.
1 Balloon.
Thick starch.
Prepare thick starch as follows: Dissolve ½ cup starch in ½ cup cold water. Boil 1¼ cups water, remove from flame, slowly stir starch mixture into boiling water. Place back on flame and let thicken stirring constantly. Let mixture cool slightly.
Inflate balloon to size desired. Fasten "Aunt Lydia's" Heavy Rug Yarn to top of balloon. Dip yarn into starch, wring slightly and then at will, wrap starched yarn around and around balloon, cut yarn. Secure a length of yarn at top of balloon; hang balloon and let yarn dry. When completely dry, deflate and remove balloon.
If desired, all starched strands may be covered with glue and dipped in glitter.
Tie with ribbon as illustrated or trim as desired.
Christmas Tree Pattern
Santa Pattern
Xmas Wreath Pattern
Christmas Pom Poms Pattern
Fluff Star Pattern
Christmas Angel Pattern
Christmas Bubbles Pattern
Christmas Cards Pattern
Small Santa Pattern
Bird Pattern
Xmas Tree Pattern
Place Card Xmas Tree Pattern
Harlequin Pattern
Xmas Bell Pattern
Basket Doily Pattern
Pink Crocheted Glitter Pattern
Glitter Star Pattern
Christmas Angel Pattern

Materials Required:
AMERICAN THREAD COMPANY
"DAWN" BULKY YARN
2 ounces White
Aluminum Foil 20 inches x 16 inches for Wings.
Crinoline 10 inches x 8 inches for Wings.
Buckram 12 inches x 8 inches for Dress.
8 inch Doll.
1 pkg. each Glitter and Glitter Glue.
10 inches Gold Cord for Halo.
Dress: Cut dress section from buckram following pattern. Each square equals one inch. Cut skein of "DAWN" Bulky yarn in half, then cut into 3½ inch lengths. Place yarn vertically on buckram about 1 inch from lower edge and machine stitch yarn to buckram (leaving 1 inch free as shown on pattern for seaming). Have yarn comfortably full (about 6 strands to every ½ inch). With heavy comb or wire brush, brush strands of yarn gently until strands are all brushed through. * Place another row of yarn vertically on buckram about 1¼ inches above 1st row and complete in same manner. Repeat from * twice. Seam dress at center back with long running sts. Place dress over doll and seam shoulders. Dot skirt of dress with glue and sprinkle with glitter.
Wings: Cut wing section from crinoline following pattern. Cut 2 wing sections from aluminum foil. Place crinoline between foil sections and glue together. Attach in position.
Halo: With Gold Christmas Cord, fold a ½ inch loop and with "STAR" Mercerized Sewing Thread sew in place, fold another ½ inch loop and sew in place. Continue forming ½ inch loops until there are ten ½ inch loops. Sew securely, then attach to top of head of doll as illustrated.


Christmas Tree Pattern
Santa Pattern
Xmas Wreath Pattern
Christmas Pom Poms Pattern
Fluff Star Pattern
Christmas Angel Pattern
Christmas Bubbles Pattern
Christmas Cards Pattern
Small Santa Pattern
Bird Pattern
Xmas Tree Pattern
Place Card Xmas Tree Pattern
Harlequin Pattern
Xmas Bell Pattern
Basket Doily Pattern
Pink Crocheted Glitter Pattern
Glitter Star Pattern
Fluff Star Ornament Pattern

Materials Required:
AMERICAN THREAD COMPANY
"Dawn" Star Spun Bulky Yarn
4 ounces Silver or color of your choice
½ yd. very stiff buckram will make 14 inch Star.
Cut 2 sections of buckram to size of Star desired.
Cut 2 skeins of yarn into 3 inch lengths. With one thickness of buckram and * starting in center of Star, machine stitch the 3 inch lengths of yarn to one point of Star (approximately 10 strands to ½ inch). Repeat from * until all points are covered. Machine stitch the 3 inch length of yarn from center of Star to between points of Star. Work other side of Star in same manner. Comb and brush each section until fluffy. Trim points to shape. Overcast both sections together. Trim as desired.
Christmas Tree Pattern
Santa Pattern
Xmas Wreath Pattern
Christmas Pom Poms Pattern
Fluff Star Pattern
Christmas Angel Pattern
Christmas Bubbles Pattern
Christmas Cards Pattern
Small Santa Pattern
Bird Pattern
Xmas Tree Pattern
Place Card Xmas Tree Pattern
Harlequin Pattern
Xmas Bell Pattern
Basket Doily Pattern
Pink Crocheted Glitter Pattern
Glitter Star Pattern
Christmas Pom Poms Pattern

Materials Required:
AMERICAN THREAD COMPANY
"DAWN" BULKY YARN
2 ounces White or Color of your choice will make 5 Fuzz balls.
Wind yarn 60 times over 3½ inch cardboard, remove yarn from cardboard, tie in center, cut both ends and trim slightly into ball shape. Comb or brush strands of yarn for fuzzy effect. Fuzz balls may be trimmed as desired, or may be fastened to velvet ribbon for garland effect.
Christmas Tree Pattern
Santa Pattern
Xmas Wreath Pattern
Christmas Pom Poms Pattern
Fluff Star Pattern
Christmas Angel Pattern
Christmas Bubbles Pattern
Christmas Cards Pattern
Small Santa Pattern
Bird Pattern
Xmas Tree Pattern
Place Card Xmas Tree Pattern
Harlequin Pattern
Xmas Bell Pattern
Basket Doily Pattern
Pink Crocheted Glitter Pattern
Glitter Star Pattern
Xmas Wreath Pattern

Materials Required:
AMERICAN THREAD COMPANY
"DAWN" STAR SPUN BULKY YARN, Article W-33M
2 oz. Silver or color of your choice.
¼ yd. section of buckram.
20" length heavy wire.
Draw an 8" circle on buckram. Draw a 7" circle inside 8" circle. Cut out center section.
Cut skein in half, then cut into 3½ inch lengths. Machine stitch through center of 3½" strands of "Dawn" Bulky Yarn to center of circle of buckram. (Stitch about 12 strands of yarn to every ½") Comb yarn for fuzzy effect. With wrong side facing place wire on buckram, fold buckram over wire and tack in place. Comb and fluff yarn over back of wreath. Trim wreath with Xmas balls, ribbon, holly or as desired.
Christmas Tree Pattern
Santa Pattern
Xmas Wreath Pattern
Christmas Pom Poms Pattern
Fluff Star Pattern
Christmas Angel Pattern
Christmas Bubbles Pattern
Christmas Cards Pattern
Small Santa Pattern
Bird Pattern
Xmas Tree Pattern
Place Card Xmas Tree Pattern
Harlequin Pattern
Xmas Bell Pattern
Basket Doily Pattern
Pink Crocheted Glitter Pattern
Glitter Star Pattern
Santa Pattern

Materials Required:
AMERICAN THREAD COMPANY
"DAWN" BULKY YARN, Article W-33.
6 oz. Crimson
4 oz. White
1 Styrofoam ball 4" diameter
2 Blue Jewel Sequins for eyes.
3 Red Jewel Sequins for Nose and Mouth
1 Wire Coat Hanger.
20" length Heavy Household Wire
5½ yards Medium Wire.
Cut medium wire into the following lengths:
Hat: 1 – 15" length for White; 1 – 20" length for Crimson
Arms: 1 – 18" length for Crimson
Body: 1 – 52" length for Crimson; 1 – 20" length for White
Legs: 1 – 36" length for Crimson
Neck: 1 – 12" length for White
Moustache – Wind White 40 times over a 5" cardboard, tie one end, cut the other end. Comb and brush until fuzzy.
Beard – Wind White 60 times over a 8" cardboard, tie one end, cut other end. Comb and brush very carefully until fuzzy.
Eyebrows – Wind White 6 times over a 2 inch cardboard, tie both ends.
HEAD – To Styrofoam ball, paste or pin in place, jeweled sequins for eyes, nose and mouth. Pin or paste eyebrows, moustache and beard in place. Tint Face with face powder and rouge. Cut remainder of White and Crimson skeins of yarn into 2 inch lengths. Thread 2 inch length of yarn through center onto wire in colors specified above, threading White on Arm and Leg wires for about 1¼ inches on each end and for about 1¼ inches on end of 20 inch length for tassel of Hat (Always bend end of wire back over 3 strands of yarn).
Frame for Body: Cut wire coat hanger in half. Use ½ for both legs. Trim and shape evenly. Bend other half over Leg section and bend again 3 inches above to form Body and upper Arm. Bind upper and lower sections together very firmly with fine wire or "Aunt Lydia's" Carpet and Button thread.
To Shape Santa: With completely threaded 18 inch length of Arm section wire, fasten center section of wire to center of Body frame. Wind round and round frame wire to form Left Shoulder and Arm. (Approximately 3½ inches will be free for movable arm). Wind other half of yarn threaded wire round and round to frame wire to form Right Shoulder and Arm. Fasten 52 inch length of yarn threaded wire under one Arm and wind 4 times around Body section, fasten at Leg section. Stuff Body with 2 sheets of tissue paper. Fasten center of 36 inch length of yarn threaded Leg wire to center of Body and wind round and round Leg of frame for Left Leg, then wind other half of yarn threaded wire to frame to form other Leg. Starting at top of Body in center back with fine wire, secure Body wires as follows: attach wire to 1st wire of Body section, * attach to next wire of body section, repeat from * until all wires have been secured. Attach White covered wire at lower edge as illustrated.
Head – Form a hook on one end of heavy household wire. With straight end of wire, pierce wire through Head, pulling wire completely through Head. Press hook into Head section. With straight end of wire, work wire down through Back of Santa, then up through Front section of Santa. Fasten wire securely at Neck. Attach 15 inch length of White covered wire to Head with fine wire. Attach 20 inch length of Crimson covered wire to Head with fine wire leaving 6 inch length of wire free for tassel of Hat. Attach 12 inch length of White covered wire at Neck.

Christmas Tree Pattern
Santa Pattern
Xmas Wreath Pattern
Christmas Pom Poms Pattern
Fluff Star Pattern
Christmas Angel Pattern
Christmas Bubbles Pattern
Christmas Cards Pattern
Small Santa Pattern
Bird Pattern
Xmas Tree Pattern
Place Card Xmas Tree Pattern
Harlequin Pattern
Xmas Bell Pattern
Basket Doily Pattern
Pink Crocheted Glitter Pattern
Glitter Star Pattern
Christmas Tree Pattern

Materials Required:
AMERICAN THREAD COMPANY
"DAWN" STAR SPUN BULKY YARN, Article W-33M
6 oz. Silver or Color of your choice for 15" tree.
4 oz. Silver or Color of your choice for 12" tree.
5 yds. Medium Floral Wire.
3 – 18" lengths Heavy Floral Wire.
White Flower Pot.
To Form Tree Branches: Cut medium floral wire into following lengths: 4 – 4" lengths, 9 – 5" lengths, 5 – 6" lengths, 7 – 8" lengths and 4 – 10" lengths. Cut skein of "Dawn" Bulky yarn in half, then cut skein into 2 inch lengths. With one of the 4" length of medium wire, thread 2" length of yarn through center onto wire. When there are 3 – 2 inch lengths of yarn on wire, bend wire back about ½" over the 3 strands to form tip of branch. Continue threading yarn (approximately 20 strands to 1½") onto wire to within one inch of end. Continue threading yarn onto all lengths of wires leaving 1 inch free at one end until all wires are covered.
To Form Tree: Bind the 3 – 18" lengths together at top and bottom for trunk of tree. Starting at top with free end of a 6 inch branch, wind branch to tree trunk. Continue winding tree branches around trunk graduating sizes to bottom of tree. Cut a disc of cardboard to fit in top of flower pot. (If ordinary clay flower pot is used, spray with snow). Puncture hole in center of cardboard, place tree trunk through hole in cardboard and through 3 empty "Star" mercerized Sewing Thread spools. Fasten wire around spools and place in flower pot. If desired, base of flower pot may be decorated with jewels, sequins or glitter. Trim tree as illustrated with multi-colored Xmas balls.
Christmas Tree Pattern
Santa Pattern
Xmas Wreath Pattern
Christmas Pom Poms Pattern
Fluff Star Pattern
Christmas Angel Pattern
Christmas Bubbles Pattern
Christmas Cards Pattern
Small Santa Pattern
Bird Pattern
Xmas Tree Pattern
Place Card Xmas Tree Pattern
Harlequin Pattern
Xmas Bell Pattern
Basket Doily Pattern
Pink Crocheted Glitter Pattern
Glitter Star Pattern
Baby & Infant Patterns eBooks
These vintage pattern books have been digitally restored, recreated as a downloadable pdf file and offered to you at the low price. Download is immediately available to you when payment is received.
Please note: An eBook is an electronic, downloadable book. You will not receive a hard copy in the mail.
The Spool Cotton Company
 |
 |
 |
 |
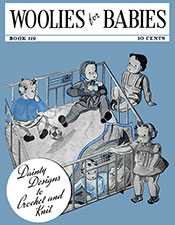
The Spool Cotton Co Book 119 |
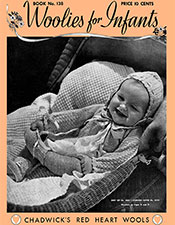
The Spool Cotton Co Book 138 |
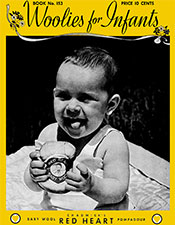
The Spool Cotton Co Book 153 |
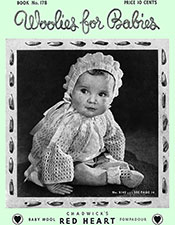
The Spool Cotton Co Book 178 |
 |
|
|
|
 |
 |
 |
 |
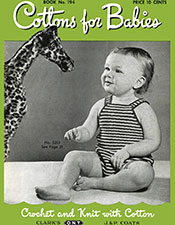
The Spool Cotton Co Book 194 |
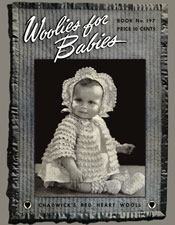
The Spool Cotton Co Book 197 |
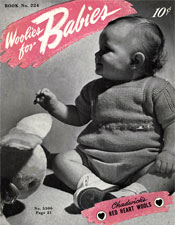
The Spool Cotton Co Book 224 |
The Spool Cotton Co Book 245 |
|
|
|
|
The American Thread Company
 |
 |
 |
|
Star / American Thread Book 43 |
Star / American Thread Book 130 |
Star / American Thread Book 153 |
|
|
|
|
|
 |
 |
||
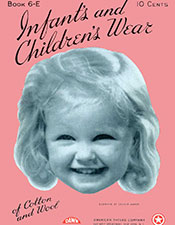
American Thread Book 6-E |
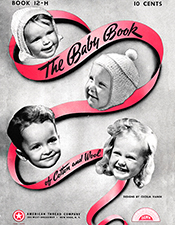
American Thread Book 12-H |
||
|
|
||
Doreen Knitting Books
 |
 |
 |
 |
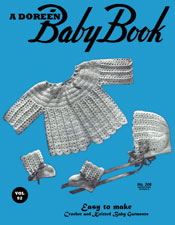
Doreen Book 92 |
Doreen Book 95 |
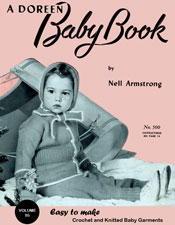
Doreen Book 100 |
Doreen Book 107 |
|
|
|
|
Jack Frost Yarn Company
 |
 |
||
Jack Frost Volume 60 |
Jack Frost Volume 61 |
||
|
|
||
Amicale Yarns
 |
|||
Amicale Yarns Book 122 |
|||
|
|||
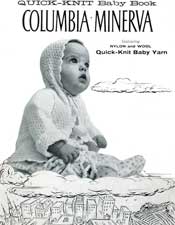
Columbia Minerva
 |
|||
Columbia Minerva Book 728 |
|||
|
|||
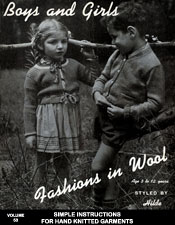
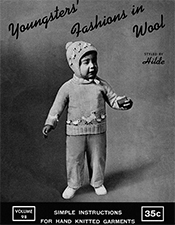
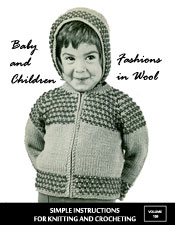
Fashions in Wool
 |
 |
 |
 |
Fashions in Wool Book 53 |
Fashions in Wool Book 98 |
Fashions in Wool Book 109 |
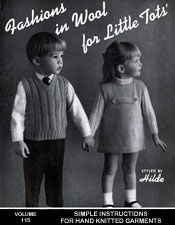
Fashions in Wool Book 115 |
|
|
|
|
Fleisher Yarns
 |
|||
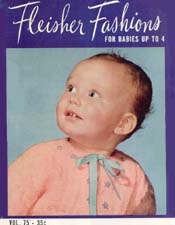
Fleisher Yarns Book 75 |
|||
Coming Soon! |
|||
Patons & Baldwins
 |
|||
Patons & Baldwins Book 78 |
|||
|
|||
Tops in Togs
 |
|||
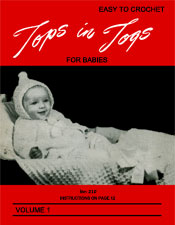
Tops in Togs Book 1 |
|||
|
|||
Other Pattern eBook Categories
| Pattern Categories Browse the categories to help you find the patterns you're looking for. |
||
    
|
|
|


Navigation

All contents © 2003-2026 Purple Kitty LLC. All rights reserved.
Privacy Policy | FAQ | About Me