 |
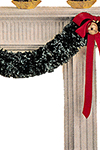
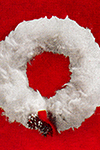
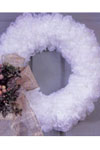
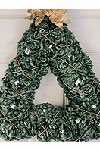
Christmas Garland Pattern

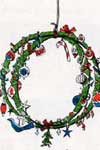
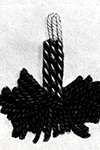
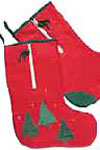
Crepe paper garland is fringed and gathered, tipped with blue "snow," caught with ribbons and Christmas balls.
Materials: Dennison's crepe paper, green (1 package will make almost 3 yds. of garland); needle and heavy-duty thread; glue; silver flitter; La France bead-bluing; green spool wire; 1½" Christmas balls; red ribbon 3" wide.
Directions: Cut folded crepe paper into 4" strips, across folds (7 strips make 4 yds. of garland). Open strip and refold to 8 thicknesses. Pin through center, cut 1½" deep fringe along both edges. Before unfolding strips, dip tips of fringe in "Christmas Blue" (directions below). Open and let dry. Brush fringe tips lightly with glue and sprinkle with silver flitter. When dry gather strips through center with needle and thread. Twist and push together to form garland. Loop garland gracefully wherever desired. Catch with ribbon bows and wired Christmas balls.
Christmas Blue: Pour 1 cup of La France bead-bluing into a small, deep bowl. Add ¼ cup cold water. Beat with egg beater into creamy consistency.
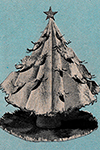
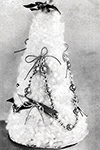
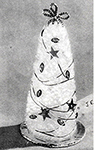
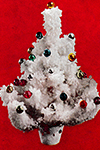
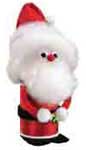
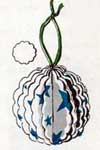
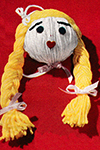
Yarn Christmas Tree and Crochet Christmas Ornaments Patterns

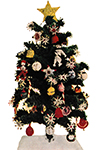
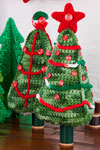
CHRISTMAS TREE
Materials: Plaster of Paris; ½" dowel stick 12" long; oblong sardine can or flat round tuna fish can; airplane cement; stiff wire; thin spool wire; 1 package green crepe paper; cotton batting; Star Silateen Sansil crochet cotton, green; C•B Tatting Cotton in a variety of colors; gold or silver flitter; steel crochet hook No. 10.
TREE: Fill oblong or round can with wet plaster of Paris. Place dowel stick upright in center of can and let plaster harden for one hour. Glue and wind dowel tree trunk with ½" strips of green crepe paper.
Branches: Cut six 4" pieces stiff wire for top row, seven 5" pieces for next row down, seven 6" pieces for next row down, eight 7" pieces for bottom row.
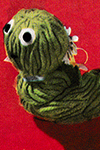
To make green needles on branches, wind crochet cotton around 2 fingers 6 times, hold at center. Clip loops at both ends and fold in half. Dab glue on folded ends of yarn, place flat on wire branch and wind over folded ends with green thread to hold in place. Fill branch with yarn needles, keeping all cut ends in same direction, to within 1" of end of wire. Put yarn needles on all branches in same way. Fasten branches to dowel trunk in rows, by wrapping ends to trunk with spool wire. Wind trunk again with ½" strips of wire. Use crepe paper to cover joints. Cover base of can with cotton.
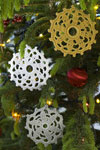
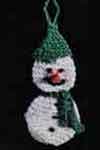
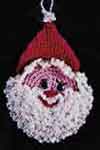
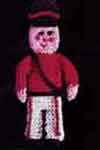
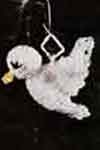
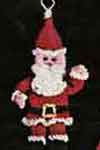
CHRISTMAS ORNAMENTS
Crocheted Trimmings: All made with tatting cotton in colors. Dip in glue all decorations except balls and canes and sprinkle with flitter.
Balls: Ch 4, join to form a ring. Ch 3, make 16 dc in ring.
Rnd 2: Work in dc, increasing to 24 sts in rnd. Join.
Rnds 3 and 4: Work even in dc.
Rnd 5: Work in dc, decreasing every 3rd st, join. Stuff with cotton.
Rnds 6 and 7: Work in dc, decreasing every 3rd st.
Ch 6, sl st in first ch to form loop.
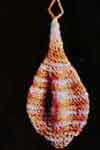
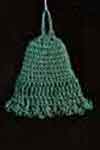
Bells: Work the same as for balls through rnd 2. Then work 7 rows even of sc. Roll edge up 1 row. Starch and stretch over thimble.
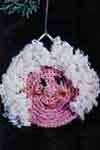
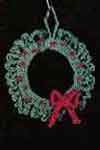
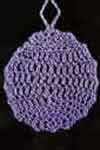
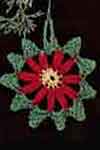
Round Decoration: Ch 5, join. Work 20 dc in ring.
Rnd 2: Ch 5, dc in next st, * ch 2, dc in next st, repeat from * around, join.
Rnd 3: Ch 3, dc in first sp, * ch 2, 2 dc in next sp, repeat from * around, join. Circles may be finished with a round of plain sc or sc and picots.
Half Circle Decorations: Start same as circle to rnd 2.
Rnd 2: Work dc and ch 2 halfway around circle and end off.
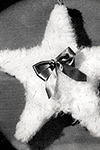
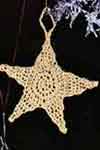
Top Star: Ch 4, join. Ch 3, make 14 dc in ring.
Rnds 2 and 3: Ch 3, dc in same st. Make 2 dc in each dc around (30 dc in rnd 2, 60 dc in rnd 3). Ch 3, turn.
Points: Ch 3, dc in next 10 dc, ch 3, turn. Skip first dc, dc in next 7 dc, skip next dc, dc in last dc. Dec in same manner for 4 more rows to form point. Break thread. Skip 1 st at base of point and attach thread. Make 4 more points the same as first.
Stars can be made smaller by using less stitches and working in same manner. Use any number of stitches divisible by 5.
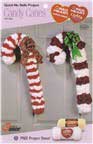
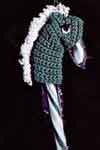
Cane: With white, ch 20. Work 2 rows of sc. Break off white and attach red. Work 2 rows of sc in red. Wrap crochet around wire in diagonal fashion, glue in place. Bend wire to form cane.
Many other decorations may be made, such as sc worked over bone rings.
McCall's Needlework & Crafts Magazine
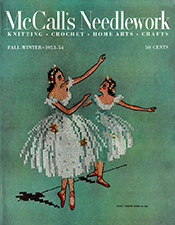
McCall's Needlework Magazine | Fall-Winter 1953-54

McCall's Needlework Magazine
Fall-Winter 1953-54
McCall Corporation
Original Copyright 1953
| PATTERN NAME | YARN | ORIG PUBLICATION |
| Christmas Garland Pattern | N/A | |
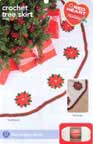
| Paper Christmas Tree Pattern | N/A | |
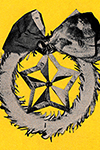
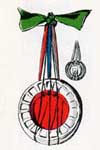
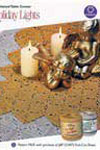
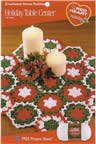
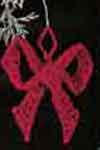
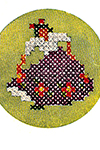
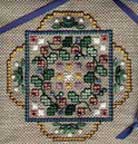
| Pinwheel Star Wreath Pattern | N/A | |
| Yarn Christmas Tree and Crochet Christmas Ornaments Patterns | N/A | |
| Angel Plaque and Yule Candles Craft Pattern | N/A |
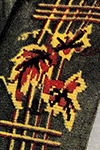
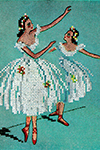
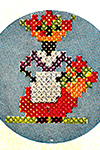
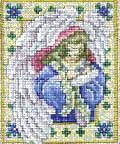
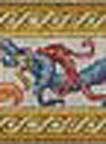
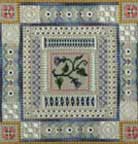
Ballet Dancers Cross Stitch Chart

Pattern includes pattern, 11¾" x 12¾" for a picture, combining cross-stitch and embroidery. A chart for placing the colors in the cross-stitch is also included.
MATERIALS REQUIRED: Six-strand cotton should be used for the embroidery, in the following colors and amounts: One skein each of dark brown, bright yellow, medium dark red, bright red, medium peach, peach, light peach, brilliant green, yellow green, medium blue gray, 2 skeins of very light grey and 4 skeins of while. For the background, use a piece of green material 18" x 22". The suitable materials are smooth linen, medium weight linen-like cotton and sateen.
CROSS-STITCH: Follow the chart for placing the colors and use six strands of six-strand cotton in the needle for the work. In working cross-stitch, it is very important to have the crosses of the entire piece crossed in the same direction. Keep the stitches as even as possible and be sure all crosses touch. To do this, put the needle in the same hole as used for the adjoining stitch.
EMBROIDERY: The dotted lines on the pattern merely indicate the separation of colors. Follow the illustration for placing the colors. Work the features first, using one strand of cotton in the needle. Lips are bright red satin-stitch, eyes dark brown outline-stitch with single stitches for the eye lashes. The green shadow around each eye is the background material. Next, work all brown outlines using two strands in the needle. Work the floor line in brown running-stitch. Next fill in the flesh tones and work shoes in Kensington-stitch using four strands in the needle. The first step in working this stitch is to make a row of long and short stitches. Into this row, work a row of long and short stitches like a row of saw teeth. Dovetail the stitches of the subsequent rows into these stitches. It is very necessary to keep an uneven edge after completing each row, so the colors will blend and not end in straight rows. The shoes are bright red with dark red soles. Peach and light peach are used for the flesh tones. Medium peach is used under each eye, to give a rouged effect.
TO BLOCK DESIGN: Cover a large bread or drawing board with clean brown wrapping paper. Mark the size of the material (18" x 22") on the brown paper. If the embroidered piece is badly soiled, it may be washed; if slightly soiled, dip in a cleaning fluid. Place the wet piece (right side up) on the board, pull edges of the material to meet the guide lines drawn on the brown paper. Tack all edges of the material to the board, placing thumb tacks close together. Allow the piece to remain on the board until thoroughly dry.
BEFORE FRAMING: The embroidered piece should be stretched over a piece of stiff cardboard, cut to fit the frame. In stretching the material, be sure to keep the design perfectly straight. Pins driven through the material and into the edge of cardboard will be helpful in keeping the material straight. Paste edge of material down on the wrong side.
SUGGESTION FOR FRAMING: The framed picture illustrated is 14" x 18". The frame is an antique white rococo molding, 2½" wide.


Christmas Craft Patterns | Christmas Wreath Patterns
More free Christmas patterns: Crochet Christmas Patterns, Knitting Christmas Patterns
Craft Patterns
 |
 |
 |
 |
 |
||
 |
 |
 |
 |
|||
 |
 |
 |
||||
 |
 |
 |
 |
 |
||
 |
 |
 |
 |
 |
||
 |
 |
 |
 |
 |
||
Crochet Patterns
 |
 |
 |
 |
 |
 |
 |
 |
 |
 |
 |
 |
 |
 |
 |
 |
 |
 |
 |
 |
 |
 |
 |
 |
 |
 |
 |
 |
 |
 |
 |
 |
 |
 |
 |
 |
 |
 |
 |
 |
 |
 |
 |
 |
 |
 |
 |
 |
|
Cross Stitch Patterns
 |
 |
 |
||||
Knitting Patterns
 |
 |
 |
||||
Sewing Patterns

|
|
|
||||
|
|
We hope you find this selection of free Christmas patterns helpful. Some of these free craft patterns may have been discontinued by Coats & Clark and may no longer be available in hard copy format. Knitting yarn or crochet thread used with original craft pattern may be a discontinued yarn or thread. Acceptable substitutes would include any other Coats & Clark yarn or thread of the same weight and/or size.
Patterns © by Coats & Clark Inc. Reproduced with permission from Coats & Clark Inc. PurpleKittyYarns.com is not endorsed by Coats & Clark Inc. It is not permissible to contract production of craft projects made from designs published by Coats & Clark to a third party for sale or distribution.
Ideas for Christmas
Christmas Crafts
Christmas Party Games
Handmade Christmas Gifts
Cross Stitch Patterns
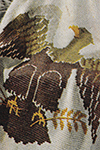
Birds
 |
 |
 |
 |
 |
 |
|
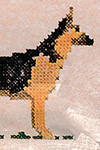
Dogs
 |
 |
 |
 |
 |
 |
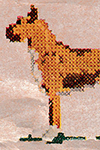 |
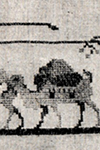
Other Animals
 |
 |
|||||
Flowers
 |
 |
 |
 |
 |
 |
 |
 |
 |
 |
 |
 |
 |
 |
 |
 |
 |
 |
 |
 |
 |
 |
 |
 |
 |
 |
 |
 |
People
 |
 |
 |
 |
 |
 |
 |
Transportation
 |
 |
|||||
Other
|
 |
|||||
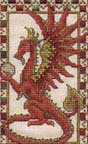
Other fabulous designs by Teresa Wentzler to purchase and cross stitch.
Browse through this list of free patterns. These craft patterns are published by Coats & Clark or TW Designworks
Coats & Clark
|
|
|||
Pattern © by Coats & Clark Inc. Reproduced with permission from Coats & Clark Inc. PurpleKittyYarns.com is not endorsed by Coats & Clark Inc. It is not permissible to contract production of projects made from designs published by Coats & Clark to a third party for sale or distribution.
TW Designworks
|
|
|
 |
 |
 |
 |
 |
 |
 |
 |
 |
 |
 |
 |
Pattern © by TW Designworks. Reproduced with permission from Teresa Wentzler. PurpleKittyYarns.com is not endorsed by TW Designworks. This is a complimentary chart, which means you may photocopy it. You may stitch it as many times as you'd like. However, since TW Designworks retains ownership of the copyright, you may not sell this chart, or profit from it in any way. It is not permissible to contract production of projects made from designs published by TW Designworks to a third party for sale or distribution.
We hope you find this selection of free cross stitch patterns helpful. Some of these free cross stitch patterns may have been discontinued and may no longer be available in hard copy format. Knitting yarn or crochet thread used with original craft pattern may be a discontinued yarn or thread. Acceptable substitutes would include any other yarn or thread of the same weight and/or size.
Ballet in Cross-stitch | McCall's No. 1806

Ballet
Pattern 1806
McCall's Pattern Company
Original Copyright 1953
Design 11¾" x 12¾"
Crosses 7 to the inch
This embroidered picture of two ballet dancers was inspired by famous ballet paintings. Cross-stitch, outline and Kensington (long and short) stitches have been combined in a decorative manner to bring out the details. It's thrilling to watch the picture come to life, as you put in the eleven colors and white. The frame used is 2½" wide. The finished picture is 14" x 18".
MATERIALS REQUIRED: Six-strand cotton should be used for the embroidery, in the following colors and amounts: One skein each of dark brown, bright yellow, medium dark red, bright red, medium peach, peach, light peach, brilliant green, yellow green, medium blue gray, 2 skeins of very light grey and 4 skeins of while. For the background, use a piece of green material 18" x 22". The suitable materials are smooth linen, medium weight linen-like cotton and sateen.
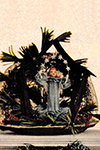
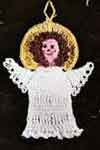
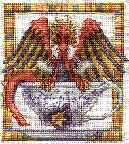
Angel Plaque and Yule Candles Craft Pattern

ANGEL PLAQUE
Materials: Dennison's crepe paper, brown, light blue, white, flesh pink; Dennison's duplex crepe paper, gold, green; gold metallic paper; two 10" paper plates; lightweight cardboard; green and white spool wire; paste; gummed tape; shallow box lid, 3½" x 5"; silver flitter; gummed silver stars; pipe cleaner; 1 marble; absorbent cotton: water colors, red, white, blue, black; wire stemmed holly berries.
Directions: Bracket: Cut 2" off one plate; 4½" off other plate. Place cut edges of plates together at right angles, secure with gummed tape across back (Fig. 1). Crush two 12" squares metallic paper between fingers, then smooth out slightly. Brush front of plates with paste and press paper onto them, overlap onto back of plates. Stretch brown crepe paper, crush and paste to back of plates, trim.
SHELTER: For roof, cut a strip of cardboard 4" x 11". Score across center and bend in half, crosswise. To make shingles, cut a 1½" wide strip from folded green duplex crepe paper. Cut scallops along one edge, 1" wide and 1" deep (Fig. 2). Paste on roof in overlapping rows, alternating scallops for shingled effect. Paste a 1" wide strip over ridge of roof. Line roof with brown crepe paper. For poles, cut 8 cardboard strips ½" x 5". Paste together in pairs to make 4 poles, leaving ½" without paste at one end of each pole. Paste crushed brown crepe paper over poles. Bend out ½" tabs and paste one pole to each corner of top of box lid. Paste crushed brown crepe paper over lid. Cut tops of poles to fit slant of roof. Paste roof on poles (Fig. 3). Stand shelter in smaller plate of bracket. Punch two holes through back plate and back edge of box lid. Fasten shelter to bracket by running green wire through holes.
PINE BOUGHS: Cut thirty pieces of green duplex crepe paper, 5" x 2", cutting 5" length with the grain. Fold in half, crosswise, and cut edges opposite fold into fine-pointed fringe. Insert a 5" piece of spool wire along fold, draw together tightly and twist ends together to hold "needle cluster" (Fig. 4). Wrap 3 to 5 needle clusters to a 12" piece of wire with a ½" strip of brown crepe paper, stretching paper slightly as you wrap. Make several more branches and join together to form spray (Fig. 5). Cover joinings with additional ½" strips of brown crepe paper. Fasten spray to back plate of bracket with green wire in same fashion as shelter. To make the berry-trimmed sprays, cut 2 strips of green duplex crepe paper 1¾" wide and 18" long, cutting the 1¾" width with grain. Fold into eighths and fringe about 1½" deep. Cut two 9" lengths of wire. Wrap entire length of each wire with fringed strip. Insert holly berries at intervals by holding stems against wire and wrapping over both together. Shape sprays into curves around base of shelter and fasten to back by poking end of wire through plate.
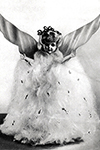
ANGEL: Head: Pad marble with cotton. Stretch a 4" square of flesh-colored crepe paper over it; tie with wire close to marble (Fig. 6). Paint in features—white eyeballs, blue eyes, black eyelids, eyelashes, eyebrows, red nostrils, mouth.
Body: Make a 4" high cone of construction paper, 1¾" across at base. Place head on top of cone, smoothing and pasting extra paper of head onto cone (Fig. 7).
Arms: Fasten center of pipe cleaner to back of neck with ½" strips of flesh-colored crepe paper wound over and around neck and pipe cleaner. Bend up ½" at each end to form hand loops.
Dress: For bottom ruffling, cut 2 strips of blue crepe paper 15" with the grain x 2". Brush one 15" edge of one strip lightly with paste; sprinkle silver flitter over paste, let dry. Fold each strip in half lengthwise; gather through fold to fit around base of cone, ½" from bottom. Attach untrimmed double ruffle to cone, ½" from bottom, by inserting wire in fold of ruffle and twisting ends tight to hold against cone. Attach flitter-trimmed ruffle just above in same manner. Make similar double ruffles for neck and wrists. Cut neck ruffle 1½" wide and 8" long, wrist ruffles 1" wide and 5" long. Decorate 1 edge of sleeve ruffles with silver flitter. Wire ruffles in place. Paste a silver star on front of neck ruffle.
For dress itself, cut blue crepe paper 4" with the grain x 10". Fold down ½" along one 10" edge. Gather along fold to fit around cone just below arms. Insert wire along fold, pull snug, twisting ends of wire together to fasten dress to body. Press paper against length of body for draped effect. Stretch paper at bottom edge to make it flare over ruffles. Paste dress to body just above bottom ruffles. Fasten edge of dress to ruffles with silver star at 1" intervals.
Hair and Halo: Cut a strip of gold duplex crepe paper, 3½" x 1¼", cutting 1¼" width with grain. Cut a 1" deep fringe along length. Curl fringe over knitting needle. Paste 2 layers of fringe around head. Paste a small square of gold crepe paper over crown, fringing edge along face to form bangs. For halo, bend a 5" piece of white wire in half and shape into a circle about ¾" across. Twist ends of wire together below circle and bend them at right angles to circle. Brush circle with paste, sprinkle with silver flitter. Paste twisted wire to back of head with a small piece of gold crepe paper.
ARCH OF STARS: Cut a 6½" piece of white wire. Twist ends through hand loops and shape wire into arch. Paste silver stars along it in pairs, back to back. Brush front of stars with paste and sprinkle with silver flitter.
WINGS: Cut 2 hearts 2¾" high and 2½" wide of white crepe paper. Fringe around edges. Brush front edges with paste, sprinkle with silver flitter. Paste wings in place.
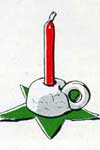
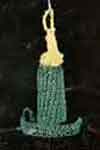
DECORATED CANDLES
Materials: Gold metallic paper; Dennison's green duplex crepe paper; green spool wire; wire-stemmed holly berries; star-shaped glass candle holders; candles.
Directions: Cover candle holders with gold paper. Make "greens" with crepe paper and berries in same way as "greens" of Angel Plaque. Twine around candles.


Gift Items | Star Book No. 135 | American Thread Company

Gift Items
Book 135
American Thread Company
No Original Copyright
  |   |   |
Craft Patterns
 |
 |
 |
 |
 |
 |
|
Crochet Patterns
 |
 |
 |
 |
 |
 |
 |
Knitting Patterns
 |
 |
|||||
| Pattern Categories Browse the categories to help you find the patterns you're looking for. |
||
    
|
|
|


Navigation

All contents © 2003-2026 Purple Kitty LLC. All rights reserved.
Privacy Policy | FAQ | About Me